The Husband and I have been together for 13 years. One thing I have learned in those 13 years is that his family has many family recipes handed down that Husband LOVES. White pizza (which isn't what you'd think but, that's another post), tidells, and cavatelli are just a few that I would like to master. So, I started with the Cavatelli.
Mind you, I have asked over and over for a recipe. But, like any good family recipe, there really isn't a recipe at all. Mother in Law and the Aunts learned from their mother who likely learned from hers and so they didn't need a recipe. They just mixed the ingredients until it felt right. Meaning well, they promised to write down a recipe the next time they made cavatelli and tried to measure the ingredients as they went in. Well, since I have been waiting and waiting, I decided to consult The Google to find a recipe with which to start out my own cavatelli making.
There seemed to be a lot of similar ingredients but different ratios amongst the recipes out there. So, I sort of formulated an average and came up with this:
6 cups AP Flour
32 oz ricotta cheese
4 eggs
2tsp salt
Seemed pretty straight forward. And pretty inexpensive which makes me happy, of course! I was lucky enough that one of Husband's aunts visited a few months ago and decided to whip up a huge batch of these little cavatelli for the family and she showed me how to make them. So, I felt like I was pretty set for this adventure in pasta.
First, put the flour in a large mixing bowl. You'll need enough head room to mix the flour with the wet ingredients so that the flour doesn't spill out everywhere.
Then, make a well in the middle and add the eggs and cheese and salt.
Using a fork, mix the wet ingredients together in the well which will also start to pull in some of the flour. Incorporate the flour in this way until it just becomes impractical to continue in the bowl. Then, take some of the flour from the bowl to dust your counter and turn the bowl out.
Knead the rest of the flour into the dough. It should be soft and moist but not sticky. There will also be moments when you are *sure* the dough won't come together but, keep going. It will become dough- I promise. Put back in the bowl and cover with a moist towel for at least a half hour. This is so that all of the flour will properly hydrate and absorb the moisture from the cheese and eggs. That will make it a cohesive dough.
After that, the real work begins. Grab a handful of dough and roll it into a snake. Then, take a knife and cut that snake into small segments like the picture.
Take those segments and roll them into the cavatelli. Do that by taking one finger and pressing into the dough while moving accross it at the same time. The goal is to have it roll over onto itself to make a little curl.
Place on a towel to dry for storage (be sure the surface is dry or they will stick when you store them in a bag or container) or cook right away for 5 minutes (or until they float) in boiling salted water.
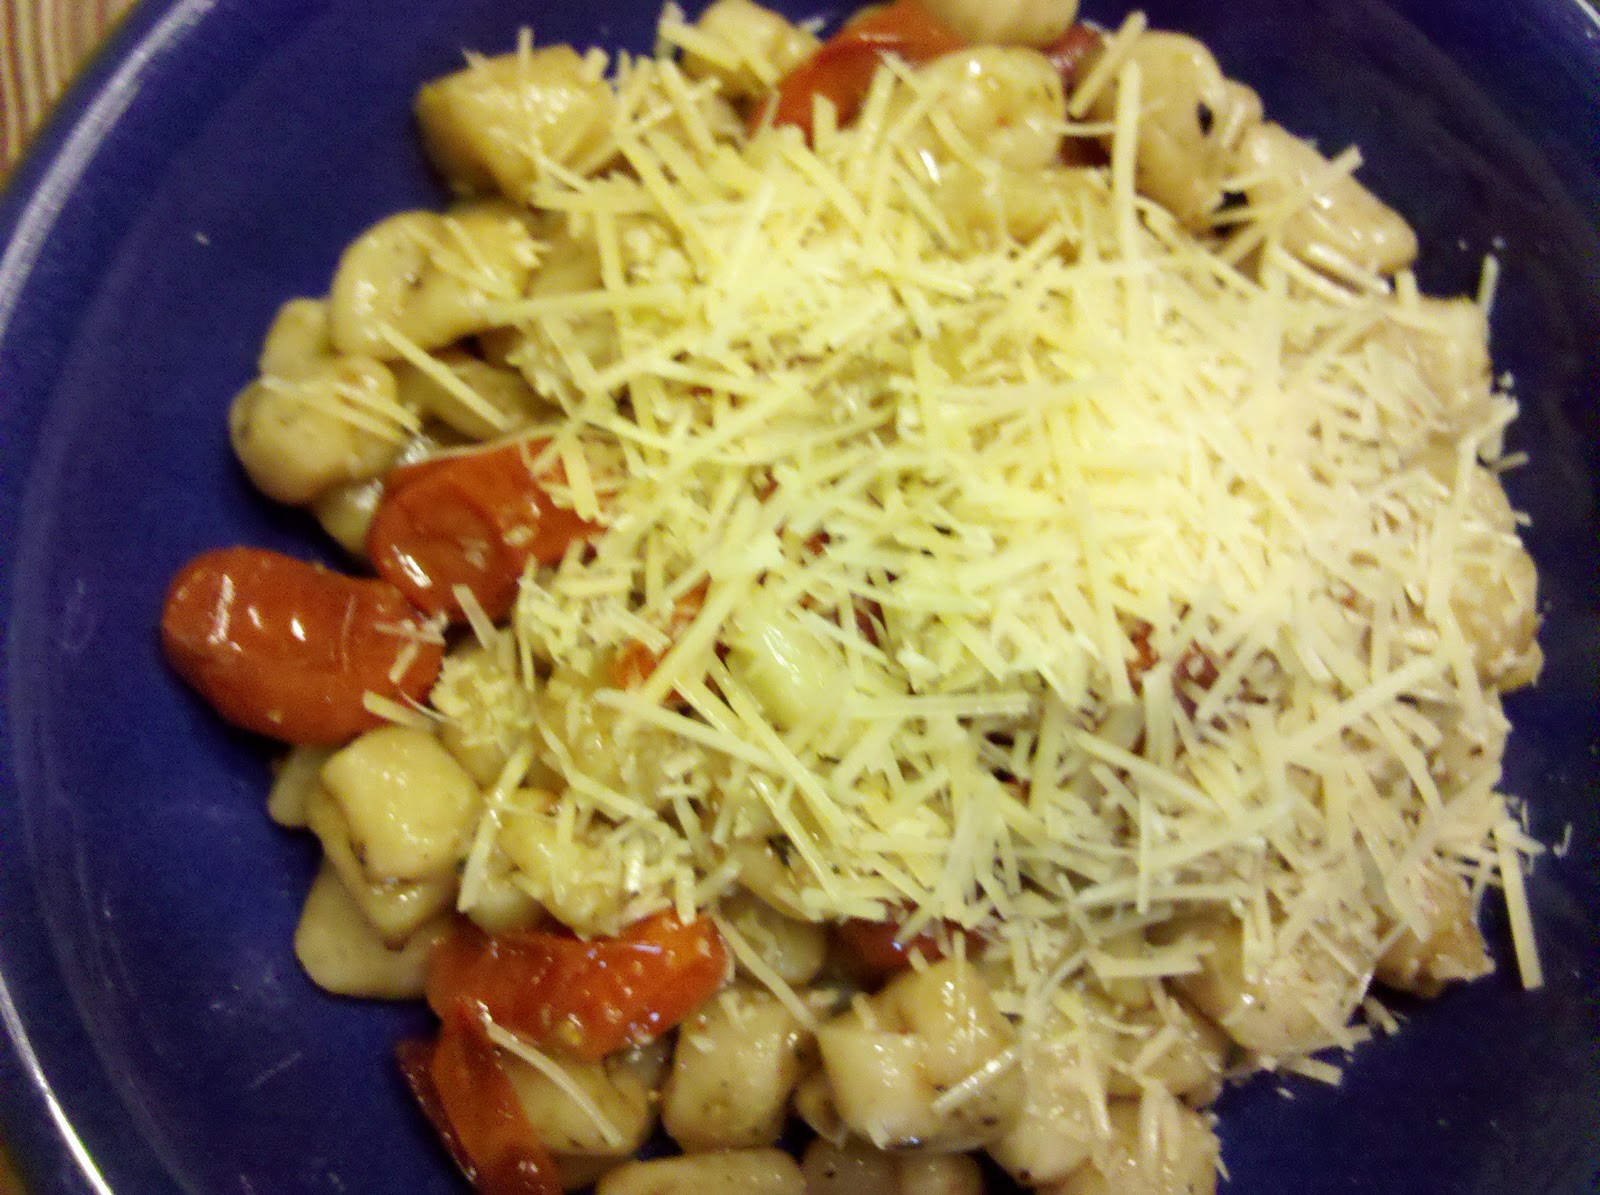
The batch I made I served with an easy roasted tomato and garlic sauce. Just roast grape tomatoes and garlic cloves until soft and caramelized (about 45 min at 400). First slather them in olive oil and some salt and pepper. Then I coated the cavatelli in olive oil and put the tomatoes and garlic over the top with the oil from the roasting pan as well. Some parmesan cheese and it was perfect!
The cavatelli was really tasty and a great vehicle for the sweetness of the roasted tomato and garlic. It was a lot of work to get all of them rolled but, we had an awesome dinner and there is a great big bag in the freezer for 2 or 3 future meals as well.
Husband is thrilled!
Give this one a try! If you don't have a lot of people to cook for or you don't want to make a large batch for freezing, you can very well halve the recipe and get the same tasty dinner for half the time I spent. It was so worth it, though.
Showing posts with label cooking. Show all posts
Saturday, January 28, 2012
Tuesday, July 27, 2010
Jam Session
After the last jam making endeavor, I thought some adjustment was in order. Some things just didn't work- the giant water canner was at the top of that list.
In order to remedy this situation, I figured that experimenting with some more jam might be a good idea. The jars are short and can easily be covered by the requisite 1-2 inches in a much shorter pot than the mammoth canner I have.
I went rummaging through all the junk I never use which is shoved in the back of some cabinet or other just waiting to fall on my unsuspecting toes if I choose to delve too deeply into the recesses of those hiding places. After the wave of curse words died down following my toe's unfortunate incident, I spied the perfect vessel.
It is a large stock pot. One I do not remember having bought or being given- it is just mysteriously there. I choose not to question my good fortune, grab the pot, and put some jam jars in there to see how they fit.
I can fit 5 jam jars into the pot at the same time with plenty of room for them to be covered. Hey, pot, if lovin' you is wrong, I don't want to be right.
I found a recipe for raspberry-pineapple jam but, seeing as I didn't have any raspberries, I made strawberry-pineapple jam. I know, all the canning recipes say not to alter them in any way lest you be cursed with botulism. But, hey, I'm more adventurous than your average fly-by-the-seat-of-your-pants jam maker.
I'm a rebel.
Here's how it went:
2 cups crushed strawberries
2 cups crushed (fresh) pineapple
1 box powdered pectin
5 cups sugar
Bring the first three ingredients to a full boil that cannot be stirred down. Boil 3 minutes.
Add sugar, return to boil and boil 3 minutes.
Process by placing in hot jars, affixing hot lids and rings, then placing in canner for a 10 minute soak in the boiling water.
The jam is sweet- the pectin I used was the regular pectin instead of the no sugar needed pectin which can jell with less sugar. I do prefer the less sweet. However, Husband loves sweet. The sweeter the better until his teeth fall out, I suppose.
Guess that's why he married me, no?
In order to remedy this situation, I figured that experimenting with some more jam might be a good idea. The jars are short and can easily be covered by the requisite 1-2 inches in a much shorter pot than the mammoth canner I have.
I went rummaging through all the junk I never use which is shoved in the back of some cabinet or other just waiting to fall on my unsuspecting toes if I choose to delve too deeply into the recesses of those hiding places. After the wave of curse words died down following my toe's unfortunate incident, I spied the perfect vessel.
It is a large stock pot. One I do not remember having bought or being given- it is just mysteriously there. I choose not to question my good fortune, grab the pot, and put some jam jars in there to see how they fit.
I can fit 5 jam jars into the pot at the same time with plenty of room for them to be covered. Hey, pot, if lovin' you is wrong, I don't want to be right.
I found a recipe for raspberry-pineapple jam but, seeing as I didn't have any raspberries, I made strawberry-pineapple jam. I know, all the canning recipes say not to alter them in any way lest you be cursed with botulism. But, hey, I'm more adventurous than your average fly-by-the-seat-of-your-pants jam maker.
I'm a rebel.
Here's how it went:
2 cups crushed strawberries
2 cups crushed (fresh) pineapple
1 box powdered pectin
5 cups sugar
Bring the first three ingredients to a full boil that cannot be stirred down. Boil 3 minutes.
Add sugar, return to boil and boil 3 minutes.
Process by placing in hot jars, affixing hot lids and rings, then placing in canner for a 10 minute soak in the boiling water.
The jam is sweet- the pectin I used was the regular pectin instead of the no sugar needed pectin which can jell with less sugar. I do prefer the less sweet. However, Husband loves sweet. The sweeter the better until his teeth fall out, I suppose.
Guess that's why he married me, no?
Tuesday, July 20, 2010
Lessons learned
Some things are harder than they look. Some things are just as hard as they look. Canning is a bit deceptive. It seems very up front- make product, put product in jars, boil jars, store product. Right? Well, here are some lessons I learned from this weekend's first adventure in canning.
Let's take this one bit at a time. The canner is big. The directions make very clear that the jars must be covered by at least 1-2 inches of water so, I filled it up accordingly. It took over an hour and 15 minutes to finally come to a boil. An hour and 15 minutes of waiting and watching and peeking under the lid and thinking about how this was a really dumb idea to begin with.
Secondly, I started the jam recipe at the same time I put the canner on to boil thinking that making jam must be complicated and time consuming. After all, they charge so much for the real fruit jams in the store. It must be difficult. So, I think that by the time this difficult product is ready for the canner, the water should be ready.
Last, the recipe has a few steps and you are given exact numbers of minutes to let the pectin boil with the fruit before the sugar is added and the exact number of minutes to let the sugar boil with the fruit/pectin mixture before the mixture has to be IMMEDIATELY deposited into hot jars and then into the canner. Or suffer the pain of death, I assumed.
Because I had started the jam so early (as I came to find out) I had to hold the fruit with the pectin boiled into it for over an hour. I turned off the burner and kept stirring until it stopped boiling and then just waited. When the canner was ready to go, I brought the fruit/pectin mixture back to a boil (and added about 1/4 cup of water to make up for the extra evaporation) and added the sugar and just continued with the recipe.
At one point, Husband was hovering over me asking if the recipe was going to fail. The directions also advise of the dire consequence of the jam not jelling if you don't adhere to the instructions word for word.
So, we just figured that it would be an exercise in practicing using the canner to see if I could even get the jars to seal. I put the hot jam into hot jars, put the hot lid on top and screwed on the ring. 6 jars into the canner for 10 minutes.
They all came out and I set them aside to be undisturbed for 8 hours like the directions say. And, a magical thing happened- I heard POP POP POP! The lids of the jars were being sucked in from the vacuum I created with my successful canning! They sealed!
I did another batch since it was obvious that the most time consuming part was heating the canner.
In the morning, I opened the jar where I had put the extra from the first batch. It was cool and ready to go in the fridge so, I tasted it to see how big a failure the batch turned into due to my flagrant misuse of the power of jam making.
It was delicious! Perfectly jelled, tart, sweet, raspberry jam! I had done it.
Of course, I have to come up with some solution to the glacial pace of the water canner boiling. It could be the canner or the burner I had to buy to use instead of my glass top stove. Husband has offered the use of the outdoor turkey fryer gas burner. I just might try that. So, stay tuned for more adventures of this Modern Housewife.
I am officially a canner!
Here is what I did (you know, the second time when I didn't screw it up):
Next week, I think I will try making strawberry pineapple jam. Maybe I should start heating the water now....
1- It will take much longer for the water in the canner to boil than you think.
2- It will take much less time to prepare the fruit and make the jam than you think.
3- The jam recipe is a lot less delicate than the directions on the box of pectin will lead you to believe.
Let's take this one bit at a time. The canner is big. The directions make very clear that the jars must be covered by at least 1-2 inches of water so, I filled it up accordingly. It took over an hour and 15 minutes to finally come to a boil. An hour and 15 minutes of waiting and watching and peeking under the lid and thinking about how this was a really dumb idea to begin with.
Secondly, I started the jam recipe at the same time I put the canner on to boil thinking that making jam must be complicated and time consuming. After all, they charge so much for the real fruit jams in the store. It must be difficult. So, I think that by the time this difficult product is ready for the canner, the water should be ready.
Last, the recipe has a few steps and you are given exact numbers of minutes to let the pectin boil with the fruit before the sugar is added and the exact number of minutes to let the sugar boil with the fruit/pectin mixture before the mixture has to be IMMEDIATELY deposited into hot jars and then into the canner. Or suffer the pain of death, I assumed.
Because I had started the jam so early (as I came to find out) I had to hold the fruit with the pectin boiled into it for over an hour. I turned off the burner and kept stirring until it stopped boiling and then just waited. When the canner was ready to go, I brought the fruit/pectin mixture back to a boil (and added about 1/4 cup of water to make up for the extra evaporation) and added the sugar and just continued with the recipe.
At one point, Husband was hovering over me asking if the recipe was going to fail. The directions also advise of the dire consequence of the jam not jelling if you don't adhere to the instructions word for word.
So, we just figured that it would be an exercise in practicing using the canner to see if I could even get the jars to seal. I put the hot jam into hot jars, put the hot lid on top and screwed on the ring. 6 jars into the canner for 10 minutes.
They all came out and I set them aside to be undisturbed for 8 hours like the directions say. And, a magical thing happened- I heard POP POP POP! The lids of the jars were being sucked in from the vacuum I created with my successful canning! They sealed!
I did another batch since it was obvious that the most time consuming part was heating the canner.
In the morning, I opened the jar where I had put the extra from the first batch. It was cool and ready to go in the fridge so, I tasted it to see how big a failure the batch turned into due to my flagrant misuse of the power of jam making.
It was delicious! Perfectly jelled, tart, sweet, raspberry jam! I had done it.
Of course, I have to come up with some solution to the glacial pace of the water canner boiling. It could be the canner or the burner I had to buy to use instead of my glass top stove. Husband has offered the use of the outdoor turkey fryer gas burner. I just might try that. So, stay tuned for more adventures of this Modern Housewife.
I am officially a canner!
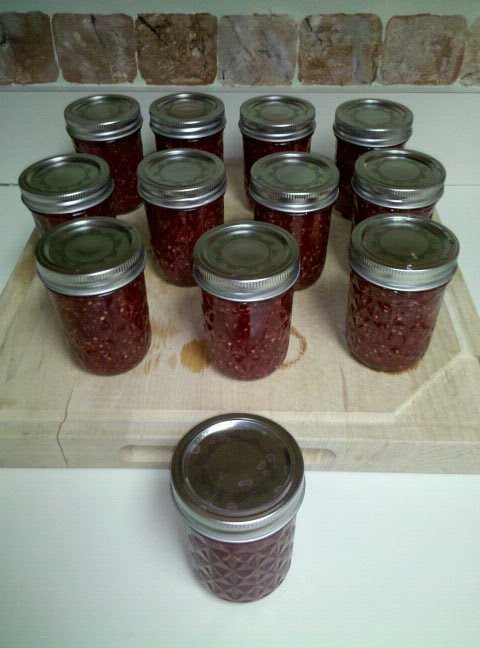
Here is what I did (you know, the second time when I didn't screw it up):
Buy 2.5lbs of raspberries and one box of no sugar needed pectin. On hand, have 3 cups of sugar.
Heat canner with enough water to cover jars by 1-2 inches.
Wash jars and 2 piece caps.
Place lids in a small pot of water which you will bring to a simmer.
Place jars into a cold oven and heat to 190 degrees and hold until ready to put jam into jars.
While the canner heats up (and give it an hour or so before you even bother to start the jam) crush your 2.5lbs of raspberries with a potato masher. Put in a 6qt saucepan and add pectin.
Bring to a boil that you cannot stir down. Boil while stirring 3 minutes.
Add 3 cups of sugar and return to a boil. Boil hard for 3 minutes.
Remove from heat and add to jars.
Put lid (straight from simmering water) on top of the jar, put the ring on and finger tighten.
Add jars to canner and process 10 minutes.
Remove from canner and place where the jars can remain undisturbed for 8 hours.
Then, as they cool, listen for the statisfying POP from each one that means your vacuum has formed!!
Next week, I think I will try making strawberry pineapple jam. Maybe I should start heating the water now....
Friday, July 16, 2010
Learning the Can Can
I am the type to jump into things with both feet. When an idea catches my fancy, I can get a bit obsessive. I consult the Google about it. I ask friends. I search blogs for information and pictures. I have to find out as much as I can about whatever thing it is RIGHT NOW. Don't get in my way! I'll lose sleep doing research and I get mighty cranky when the internet connection at home decides to become unreliable which it normally does just when I am on one of my quests.
My newest thing is canning. Well, it isn't new. I have always been a bit of a frontier woman at heart. A few years ago, after we suffered a second major hurricane in our area just two weeks after the first, I was a happy camper in the aftermath. Of course, that was because we didn't suffer any major damage but, mostly it was because things got a lot more simple and I had to be much more creative to work with what we had.
Husband and I were both off of work since the roads weren't safe and we were making food on the grill daily, washing yesterday's clothes in the sink in the morning and hanging them on the line outside just as the sun was coming up. Going out and searching for food in the few grocery stores that had generators and making do with what they had on their picked-over shelves.
Canning, for me, is one of those life skills that I think everyone should know how to do. It saves fruits in the peak of the season when they taste best and when they are the least expensive. It can also provide lots of homemade good food in case of some natural disaster like those hurricanes.
This modern housewife has to consider such things when planning for summer.
I decided to order a canning starter kit. It has the big pot and the rack and jar lifter and whatnot. I was giddy with anticipation of the equipment for my new hobby winging its way to my door.
I was so excited when it arrived. I opened it up and admired it and took out the rack and the canning utensils. And then I saw it. I saw the label that said I can't use it on a glass top stove!! The woman in me who doesn't want to wait one second longer to try something new threw a toddlereque tantrum.
Being the crazy Googler that I am, I quickly found a solution. If we buy one of those countertop burners, I can use my new canner on that instead. I found that this problem wasn't so uncommon.
This weekend, we are headed to Walmart to buy the burner and some new jars so that I can can some raspberry jam- my favorite. No doubt I won't be able to wait long to put these things to their first use so.....
....if you don't hear from me by Monday- send help!
My newest thing is canning. Well, it isn't new. I have always been a bit of a frontier woman at heart. A few years ago, after we suffered a second major hurricane in our area just two weeks after the first, I was a happy camper in the aftermath. Of course, that was because we didn't suffer any major damage but, mostly it was because things got a lot more simple and I had to be much more creative to work with what we had.
Husband and I were both off of work since the roads weren't safe and we were making food on the grill daily, washing yesterday's clothes in the sink in the morning and hanging them on the line outside just as the sun was coming up. Going out and searching for food in the few grocery stores that had generators and making do with what they had on their picked-over shelves.
Canning, for me, is one of those life skills that I think everyone should know how to do. It saves fruits in the peak of the season when they taste best and when they are the least expensive. It can also provide lots of homemade good food in case of some natural disaster like those hurricanes.
This modern housewife has to consider such things when planning for summer.
I decided to order a canning starter kit. It has the big pot and the rack and jar lifter and whatnot. I was giddy with anticipation of the equipment for my new hobby winging its way to my door.
I was so excited when it arrived. I opened it up and admired it and took out the rack and the canning utensils. And then I saw it. I saw the label that said I can't use it on a glass top stove!! The woman in me who doesn't want to wait one second longer to try something new threw a toddlereque tantrum.
Being the crazy Googler that I am, I quickly found a solution. If we buy one of those countertop burners, I can use my new canner on that instead. I found that this problem wasn't so uncommon.
This weekend, we are headed to Walmart to buy the burner and some new jars so that I can can some raspberry jam- my favorite. No doubt I won't be able to wait long to put these things to their first use so.....
....if you don't hear from me by Monday- send help!
Tuesday, July 13, 2010
Yogurt Making
My boys hate milk. I give them a cup of it and they get all excited because they think it is going to be something they love like water with a dash of juice in it. When they realize it is milk, they make a face and toss it.
I know so many kids that drink milk like a booze hound goes after the dregs of the eggnog on boxing day. But mine? It's like I laced their sippies with rat poison.
So, what's a Mama to do when she has growing boys that refuse to drink their bone building juice? Make yogurt.
Now, before I made it, I thought this would be the feather in the cap of all my culinary triumphs in the past. Surely I couldn't take milk and turn it into yogurt. Yogurt was something mass produced and bought in a store. By me. Frequently. But, it had to stop. Organic whole milk yogurt is expensive and sometimes hard to find in the stores near me.
So, I pulled out my book about making food for babies to read up on how to do it. I made a few adjustments that work best with what I've got. Here it is for you!
Get some quart size Mason jars- the quarts work best for me (despite this picture- it was the first batch that I made with smaller jars which didn't work quite as well). Fill them with the milk of your choice. For us, I want organic and I need the whole milk since the boys are under two years old and need the fats.
Place jars into a large pot. I can fit 4 quart size jars in my pot.
Insert a candy thermometer into one of the jars. Fill the pot with water until about 1.5 inches from the tops of the jars. Place pot on your stove.
Turn on medium high and wait for water to boil to begin checking the temperature of your milk. You are trying to scald it to remove harmful bacteria before adding the good guys to make the yogurt. That happens at about 180-190 degrees.
To save time and make sure I don't introduce any bacteria to the scalded milk, I drop a spoon and the lids and rings for the jars into the pot while it boils to make sure there aren't any bad critters left to hitch a ride into my warm milk.
Once the milk reaches the proper temperature, remove it from the pot and let it cool to between 110 and 120 degrees. This takes about an hour to an hour and a half. During cooling time, check it a few times and stir it with the thermometer to distribute any cool or warm spots.
While it cools, get your incubation spot all ready. What worked for me was this: on the counter, put a heating pad on high and cover with 4 layers of fleece (just a folded fleece blanket). I put a cooling rack on top of the pad under the fleece. I also used our outdoor thermometer and stuck it under there to monitor them temp. You are looking for between 90 and 120 degrees. My setup keeps it around 110.
Once the milk has cooled you have two choices. The first is to use yogurt starter which is a powder of yogurt culture you add to the milk. The second is to add 1tbs per quart of pre made yogurt. This can be storebought or from a previous batch of homemade yogurt.
For my first batch, I used the starter just to be sure I'd get good bacteria action. For the second batch, I used leftover yogurt from the first batch. Both worked great.
Stir in your choice with your sterile spoon and lid your jars. Place them under the fleece on the rack for at least 4 hours, checking the temperature of the thermometer placed under there occasionally.
Then....YOGURT! Refrigerate and enjoy!
I couldn't believe I had done it. It was so satisfying to see that milk turned into a custardy yogurt. It felt like magic and, even only the second time through, the process has gotten so streamlined that I literally almost forgot I was incubating it!
What a rewarding sight it was when I gave the yogurt to the boys the next day (mixed with a dab of low-sugar homemade strawberry freezer jam). They loved it so much that they clapped while they ate it!
Subscribe to:
Posts (Atom)